


Think Lifestyle, Not Resolution
Antoni Favata
NASM-CPT, CES, CF-L1, FMS, SGX-OS
You hear about it year after year. Creating resolutions to begin a new year with a new you on Jan. 1. For a lot of people these resolutions focus around health and fitness.
However, most people with good intentions who set these realistic goals tend to lose steam and momentum come February.
So, what can we do to ensure our success with these not so lofty goals?
Here are a few tips to keep you on track and on target so you hit your mark and maintain your achievements for years to come.
- Think Lifestyle, Not Resolution
We often think of these resolutions in terms of extremes. Instead, we should think of these choices as a way of life and incorporate small changes every day. Change your mindset from “all or nothing” to “one day at a time.”
- Smaller, Manageable Habits
Small habits are not only more attainable, but easier to manage and maintain. Start with easier changes and build on them as they become regular practice. Smaller habits help you stay more motivated, too! Development and success of these smaller habits creates a growing sense of achievement as you get closer to a larger goal.
- Variety
It’s true, most of us struggle with having a short attention span. And for a lot of people that short attention span affects our fitness routine, which can derail progress. Even the word routine can be daunting for some. Fortunately, these days the Fitness Industry is not short on options. Keep exercise and movement fun by mixing up your routine. Subscribe to something new and exciting. Variety will help keep you on track by providing a new challenge to help keep your mind and body stimulated.
Instead of New Year’s resolutions set intentions instead, focusing on manageable lifestyle changes that will set you on a path to success.
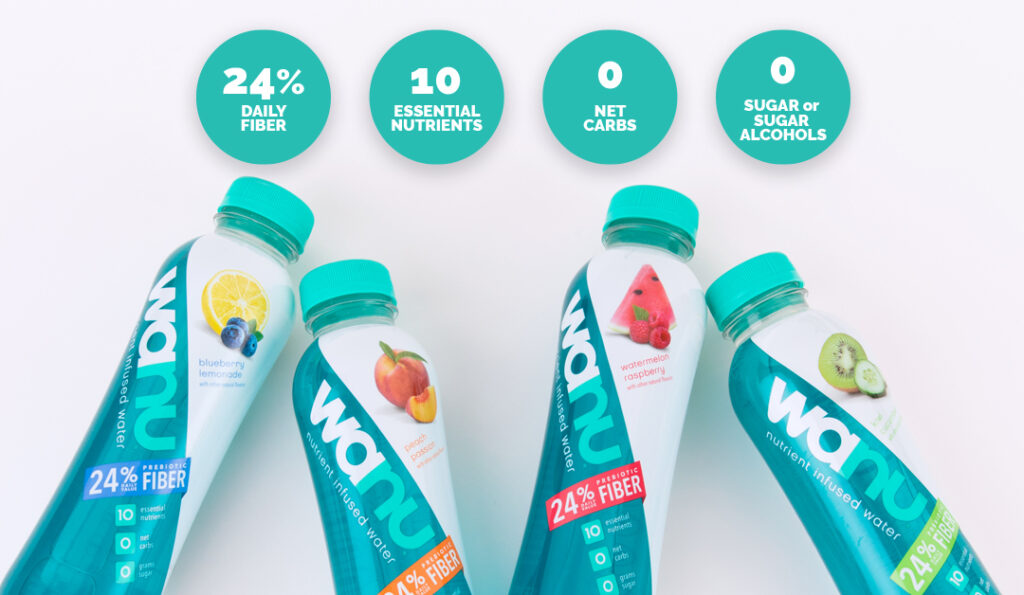
New Items: wanu water
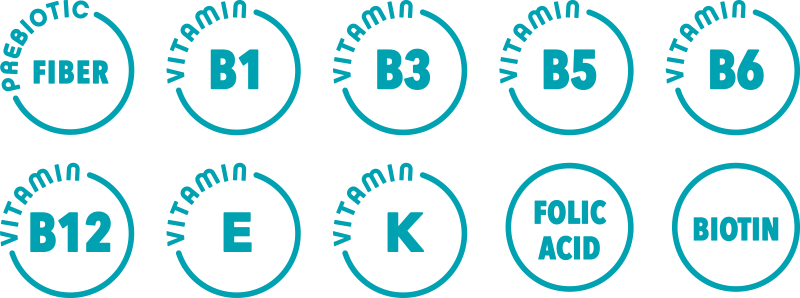
“95% of American adults are deficient in fiber, so we created wanu water as an easy + delicious way to get 24% of your daily fiber intake in every bottle. With 7g of plant based prebiotic fiber + 9 other essential nutrients, wanu supports a healthy immune system + digestive system, as well as naturally boosts your energy + metabolism while you hydrate!” – Todd O’Gara, Founder
wanu water is now available at your local Price Chopper in (4) refreshing flavors: Blueberry Lemonade, Peach Passion, Watermelon Raspberry, and Kiwi Cucumber.
Natural fruit flavors, paired with the perfect balance of a monk fruit/stevia blend, form wanu’s unique + delicious recipe. With no sugar, artificial sweeteners, or sugar alcohols, wanu makes it easy to stay healthy + hydrated when you want more than just plain water.
With 100% B12, you can enjoy wanu before a workout or as an afternoon pick-me-up for a natural energy boost. It’s also the perfect non-dairy alternative for smoothies, healthier mixer for cocktails, and base for homemade popsicles!
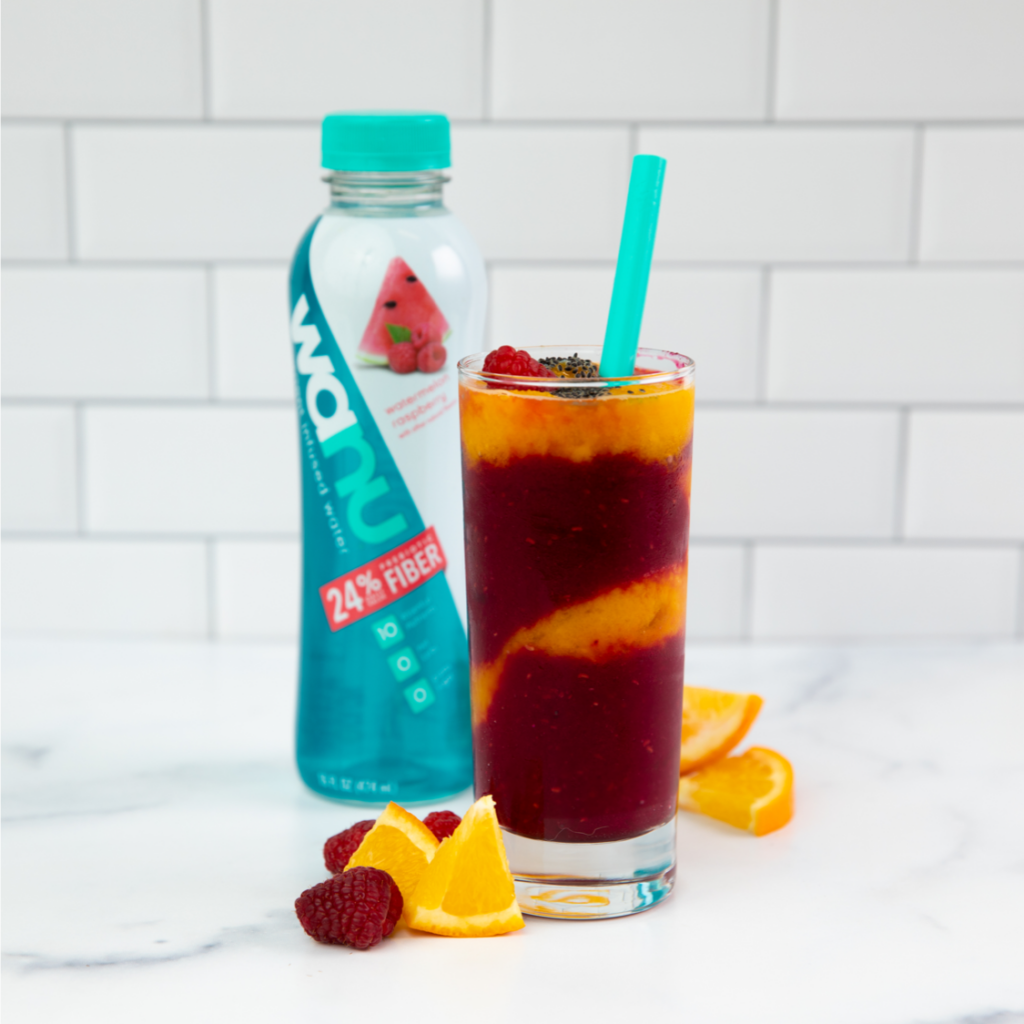
wanu Immune Boosting Citrus Smoothie
Ingredients:
- 1 cup frozen mango chunks
- juice of 1 lemon
- ½ tsp ground turmeric
- ¼ tsp ground cayenne pepper
- ¾ cup fresh squeezed orange juice
- 2 tsp fresh grated ginger
- 1 small red beet, chopped
- 1 cup frozen raspberries
- 1 orange, peeled
- ½ cup Watermelon Raspberry wanu
- Chia seeds for topping (optional)
Directions:
- In a blender, combine the mango, lemon juice, turmeric, cayenne, ginger, and orange juice. Blend until completely smooth. Pour into a tall glass.
- Rinse the blender out. Combine the beets, raspberries, orange, and wanu water. Blend until smooth and creamy, adding more wanu water if needed to reach your desired consistency. Pour over the mango mixture and stir gently to swirl. Top with chia seeds, if desired.
Find wanu in the enhanced water/functional beverage aisle!

Celebrate with Cheese Pairings!
For many, cheese is a staple when it comes to celebrating, especially during the holidays. Luckily, our in-store delis provide a plethora of tasty cheeses, perfect for pairing with a relaxing drink. We’ve created a list of some of our favorites, each with their ideal beverage pairings. Try these options below and find your new favorite combination!
Vermont Creamery Honey Goat Log: Vermont Creamery Clover Blossom Honey Goat Cheese takes Vermont’s classic, mild fresh goat cheese and blends it with sweet clover honey. The honey pairs perfectly with the tart creaminess of fresh goat cheese. Try it with Barbera wine, Founders All Day IPA or a Belgian Tripel Beer like Ommegang’s Three Philosophers.
Fleur de Franco Brie: A beautiful wheel of French double cream Brie, Fleur de Franco is pleasantly mild and approachable, yet fully flavored with a buttery interior and soft, fluffy rind. Pair it with a sparkling wine, Chardonnay, or a German pilsner like Saranac Adirondack Lager.
Grafton 2 Year Old Cheddar: Fits the classic profile of a New England Cheddar: buttery notes with a bold, sharp tang and a long, nutty finish. The aroma is lactic and bright, with flavors of sweet cream, freshly mown hay, and tangy, cultured milk. Completed by a moderate acidity. Pair it with balanced, full-bodied wines such as Merlot or White Burgundy, or brews such as Smuttynose Old Brown Dog Brown Ale, Brooklyn Brewing Bel-Air Sour Beer, or even Angry Orchard Hard Cider.
Market 32 American Grana by BelGioioso: Made from freshly gathered local raw milk, this premium American Grana Parmesan cheese is allowed to mature a minimum of 18 months on wooden shelves in special caves. During this process, each wheel is hand-turned to ensure proper aging and development of its deep, nutty flavor and granular texture. Try it with bold Cabernet Sauvignon or a bock beer like Shiner Bock.
BelGioioso Creamy Gorgonzola: Handcrafted and aged 90 days in special caves, master cheesemakers hand-rub each wheel with salt and pierce small holes into the rind of the cheese, allowing air to penetrate and facilitate the growth of beneficial mold. This care and craft creates an exceptionally earthy flavor and creamy texture. Cut right through the thin rind and spread on a baguette. Great when paired with a Harpoon Rec League or other light IPA’s.
Any of these ideas pique your interest? Visit us online or at your local store to find all of these pairing items!
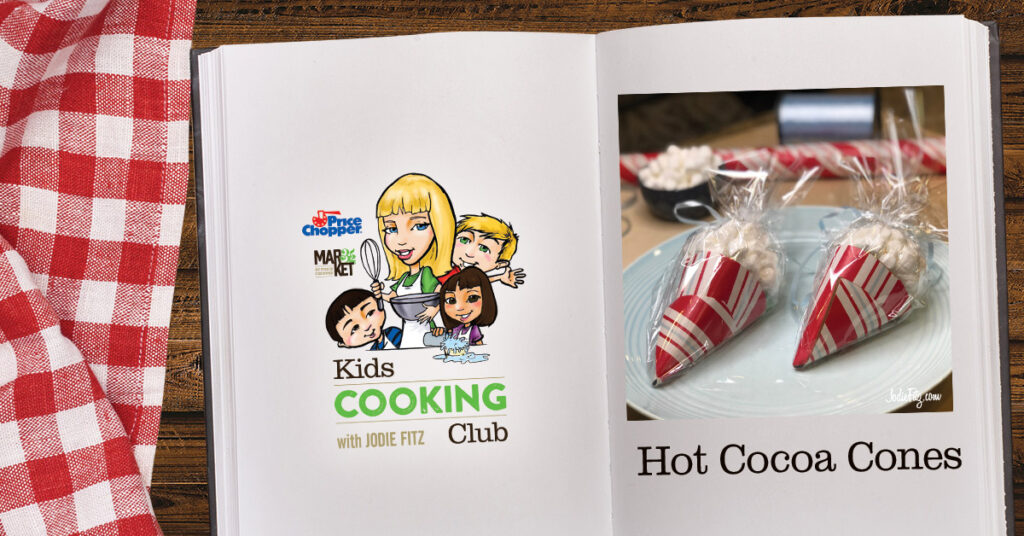
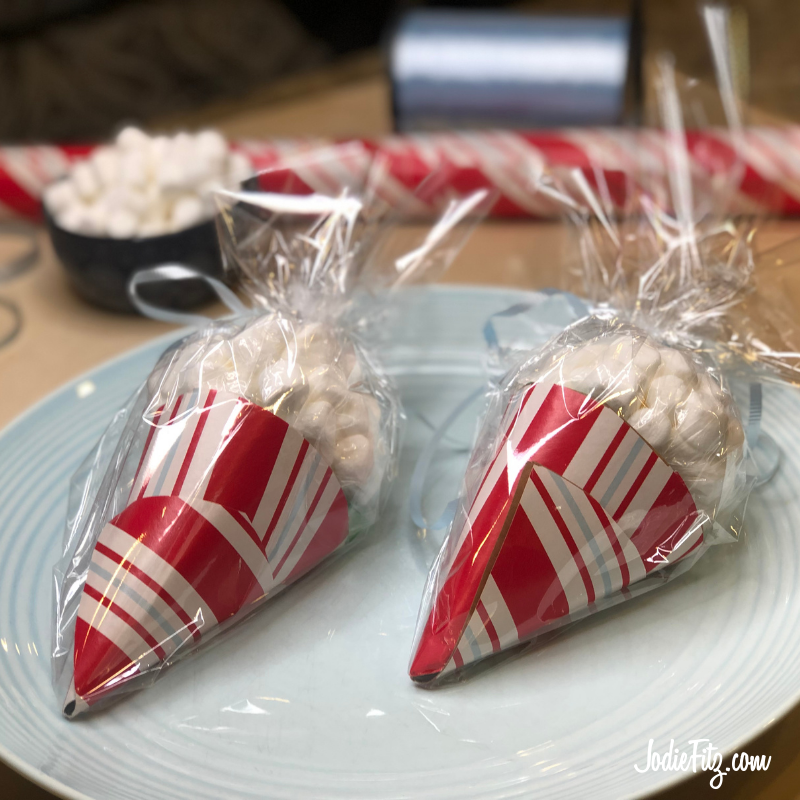
KCC Hot Cocoa Cones by Jodie Fitz
Supplies Needed:
Price Chopper or Market 32 Paper Grocery Bag (or craft paper)
Double sided tape
Regular tape
Holiday wrapping paper
Cellophane
Ribbon
PICS Instant Hot Chocolate Packets
PICS Mini Marshmallows
PICS Snap and seal sandwich size bag
Tools Needed:
Scissors
Pencil
Bowl
Directions:
- Create a template on the paper bag or craft paper by flipping a bowl upside down and tracing it with a pencil. The bowl should be a medium sized bowl, approximately 8 “ in diameter. It does not have to be exact.
- Using scissors, cut out the paper circle. Note: You need a paper bag circle for every cone you create; it provides the stability to the cone.
- Lay the paper bag circle on top of wrapping paper, trace a circle and cut it out. Attach the two circles together with double sided tape.
- Draw a pencil circle in the center of each circle.
- Cut out a pie shaped triangular piece like in the video. It will look almost like a Pac-Man character.
- Roll the circle by overlapping the cut pieces until it forms a cone shape. Keep it in position by placing a double-sided piece of tape where the overlap pieces come together.
- Roll the hot chocolate packet and insert it into the cone.
- Fill the snap and seal bag about a third of the way full with mini marshmallows. Release the air before sealing it. Roll the empty end and tuck it into the cone. Tape it into place.
- Cut a square piece of clear cellophane. Place the pointed end of the cone in the center, bring the cellophane up around the cone and tie the top off with a ribbon.
Optional: Add a personal note and share with friends!
Where to Find Everything?
Paper Bags: Reuse a brown paper grocery bag. Or, you can purchase a roll of brown craft paper.
Double sided tape, regular tape, pencils & scissors: You can find these in the school supply aisle.
Holiday wrapping paper, cellophane and ribbon: You can find these items in the seasonal aisle, and also the greeting card section at Price Chopper/Market 32.
Hot Cocoa Packets: This is typically located in the coffee and tea aisle.
Mini Marshmallows: Typically found in the baking aisle.
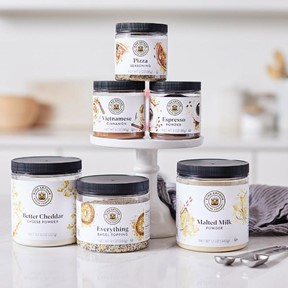
New Items: King Arthur Spices
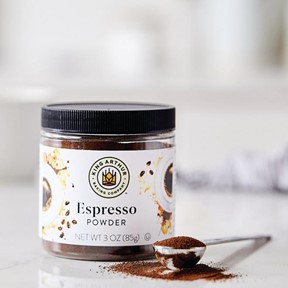
Espresso Powder: A baker’s secret ingredient for rich chocolate flavor
Now available in the Spice aisle, you can find King Arthur Baking Company’s most coveted test kitchen ingredients for better baked good: Espresso Powder, Vietnamese Cinnamon, Cheese Powder, Everything Bagel Topping, Pizza Seasoning, and Malted Milk Powder.
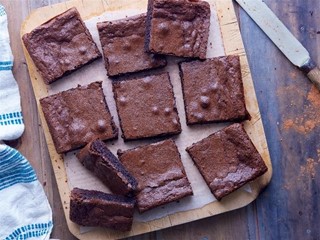
Imagine a secret ingredient that could make chocolate taste more like chocolate. Too good to be true, you’re thinking, but such a miracle exists: espresso powder.
A pinch of espresso powder greatly enhances and intensifies the chocolate flavor in brownies, cakes, and more — without transitioning your treat to mocha-flavored. Think of it as a supporting actor that helps the star ingredient shine, much like a pinch of salt takes the flavor of cookies from flat to robust, without adding any savory flavor.
Espresso powder is not the same as instant coffee. Espresso powder is made from darkly roasted coffee beans that have been ground, brewed, dried, and then ground to a very fine powder. It’s much more concentrated than instant coffee, which means you only need a teaspoon or so in your chocolate recipe to do the trick.
Don’t let the name fool you; in small amounts, espresso powder doesn’t add any coffee flavor to your baked goods. It merely makes chocolate tastes more intense and rich.
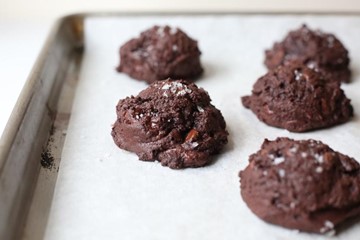
Try baking your favorite brownie recipe, any one you like, without espresso powder and with it. You’ll notice a subtle difference. The batch made with espresso powder will have a more complex, deep chocolate flavor. This is a particularly useful baker’s trick for enhancing less fancy chocolate: If you don’t want to spring for expensive cocoa powder or chocolate, adding espresso powder can help “dress up” the chocolate flavor.
Here are some favorite recipes:


New Items: Cathedral City Cheddar Cheese
Cathedral City® Cheddar Cheese, the UK’s favourite cheddar cheese now available in the United States!
Great Britain is famous for many things… Kings and Queens, medieval castles, Shakespeare…but most importantly, it’s the birthplace of cheddar cheese. And when it comes to cheddar, the UK’s favourite by far is Cathedral City® Cheddar Cheese. And it’s easy to see why the Brits love it so much. Expertly made for over 50 years, Cathedral City® Cheddar Cheese consistently delivers on superior taste and the highest quality.
It’s made at a multi-award-winning creamery in the county of Cornwall in the South West of England using 100% British milk from dedicated local farms. The location provides the ideal climate for cows to graze; producing the rich, creamy milk that’s at the heart of their cheddar. And the way their cheese matures ensures the unique and much-loved taste for all to enjoy. Cathedral City® even supplies Cheddar Cheese to Her Majesty The Queen, for which they hold a Royal Warrant.
Their chunk range consists of three classic English cheddars. Whether it be the smoothness of Mature, the richness of Extra Mature, or the crunchy bite of Vintage, each Cathedral City® Cheddar Cheese will bring a distinctive British touch, turning your cheeseboard into something a little more special. And there are no flavourings, colourings, or anything else added!
Cathedral City® Cheddar Cheese’s packaging is different from many other cheddars, which are typically shrink-wrapped. That’s because they believe a special cheese should have a special wrapper.
The innovative “pillow pack” is specially designed to be less tightly wrapped around the cheese but is still completely sealed and airtight. Years of experience have taught them that this, together with the high barrier film and the seal integrity, help maintain the high quality of their cheddar. The pack also has a “press to close” feature at the top, allowing easier reclosing of the wrapper and better conservation of the cheese (and there’s no need to use another plastic bag). The opening is designed to enable the cheese to be easily taken out of and put back into the pack.
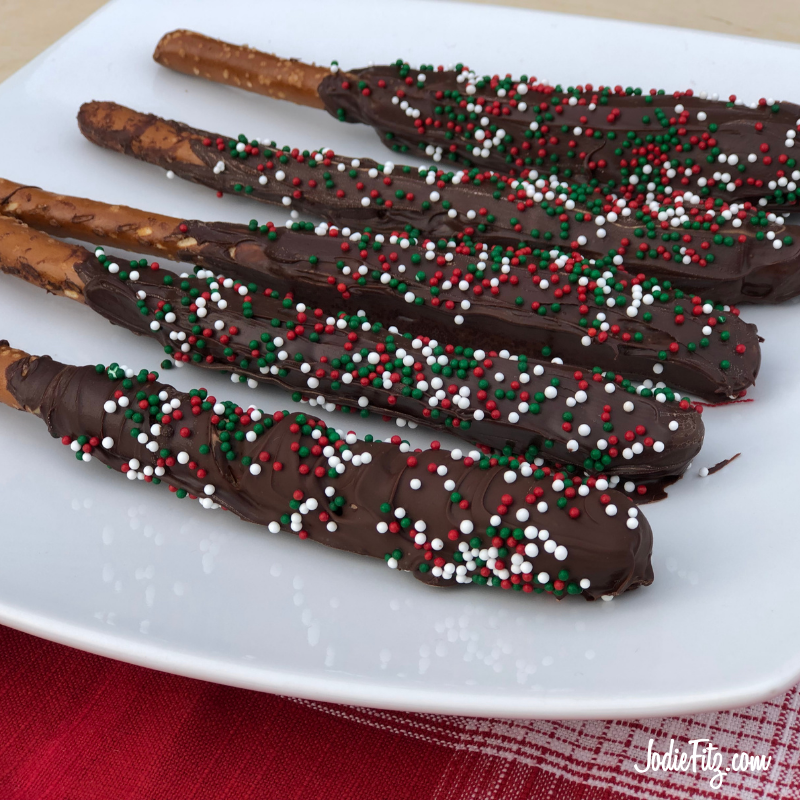
Chocolate Covered Pretzels with Caramel and Peanut Butter
Jodie Fitz
PICS Pretzel rods
PICS Mini chocolate morsels, dark, milk or semi-sweet
Caramel apple wraps
PICS Peanut butter (optional)
Colored sprinkles
PICS Nonstick cooking spray
Coat a pizza cutter with nonstick cooking spray.
Place the caramel wraps, one at a time, on a cutting board with a piece of parchment paper between the caramel wrap and your cutting board. Note: The caramel comes with parchment paper dividers that you can use; this prevents the caramel from sticking to the cutting board.
Using the pizza cutter, cut the caramel wraps into one inch strips.
Starting at least two inches from one end of the pretzel, carefully wrap the caramel strips around the rest of the pretzel. Set the caramel wrapped pretzels onto a wax paper lined cookie sheet and set aside.
Pour chocolate morsels into a tall drinking glass, Microwave the chocolates in the glass on high for one minute. The chocolate will not look fully melted, stir the morsels together until they fully melt after removing the glass from the microwave.
Dip the caramel covered pretzel into the chocolate leaving the unwrapped end exposed.
Set the pretzel back onto the waxed paper and coat with a thin layer of colored sprinkles.
Let the pretzels set until the chocolate has hardened.
Keep the pretzels in cool storage.
The Caramel Wraps? You can typically locate these in the produce area of your Price Chopper and Market 32 Supermarkets near the apples.
Add Peanut Butter! Simply spread a light layer of peanut butter onto the pretzel before wrapping it with caramel. Follow the rest of the directions as is.
Nut allergies? Replace the peanut butter powder with WowButter®. It’s a delicious nut free, tree nut free, gluten free peanut butter alternative. It can be found in the allergy friendly aisle at your Price Chopper and Market 32 Supermarkets.
So Much Fun with Kids! There’s lessons in every recipe making experience for the kids in your life. Here are a few activities to concentrate on when making this no bake pretzel fun;
- Cutting safety
- Wrapping
- Dipping
- Melting chocolate
- Spreading
- Sprinkling
- Following directions
Chocolate Caramel Filled Shortbread Cookies
Jodie Fitz
½ cup PICS butter, room temperature
1 teaspoon PICS vanilla extract
1 PICS egg, large
½ cup PICS confectioner’s sugar
1 ½ cups PICS all-purpose flour
¾ cup PICS mini chocolate chips
Filling
2 tablespoons PICS butter
3 tablespoon PICS milk
5 oz. Caramel candies, unwrapped
¼ cup mini chocolate chips
Preheat the oven to 350 degrees.
Using an electric mixer, whip together the room temperature butter with the vanilla extract, egg and confectioner’s sugar. Slowly add in the flour continuing to mix with the electric mixer until all ingredients are mixed well.
Using a spatula, fold in the mini chocolate chips.
Form the dough into small cookie dough balls and slightly flatten them and place them onto a parchment paper lined baking sheet.
Using a tablespoon sized measuring spoon, dip the base of the measuring spoon into confectioner’s sugar and press it into each cookie to create an indent.
Bake the cookies for 10 – 12 minutes.
Recipe makes approximately 18 cookies.
While the cookies are baking and cooling, prep the filling by first melting 2 tablespoons of butter over low heat in a saucepan. Once melted, over low heat, add in the 3 tablespoons of milk, 5 oz. unwrapped caramel candies and stir until the candies have melted and the three ingredients are mixed together well. Turn off the heat and add in ¼ cup of mini chocolate chips. Continue to stir until they are fully melted and mixed in.
Add the filling into a piping bag once it’s slightly cooled and can be handled. If you don’t have a piping bag, add the filling to a quart sized freezer bag and clip one corner.
Pipe the filling into the cookie indent. Let the cookies set until the center hardens, approximately 30 minutes.
Optional: Add sprinkles on top before the center hardens.
Storing: If you are layering the cookies when storing in an airtight container, keep a of layer parchment paper between the layers to prevent the cookie centers from sticking to other cookies.
So Much Fun with Kids! There’s lessons in every recipe making experience for the kids in your life. Here are a few activities to concentrate on when making these cookies:
- Measuring ingredients
- Mixing
- Electric mixer safety
- Melting
- Stovetop safety
- Piping
- Following directions
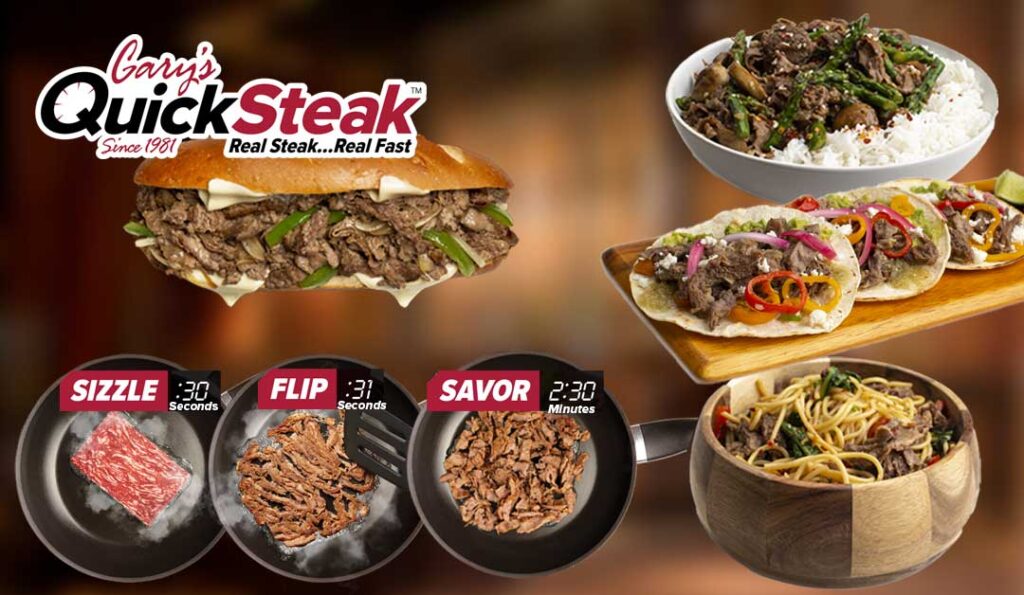
New Items: Gary's Quick Steak
Gary Rohwer of Gary’s QuickSteak has reinvented the effort it takes to make a great cheesesteak, without sacrificing the flavor, and now we’re bringing his product to the frozen meat section of your favorite grocer.
Gary’s QuickSteak is 100% All Natural, thinly sliced, sirloin steak with no artificial ingredients that cooks from frozen in minutes offering a variety of delicious meal choices.
Being pre-sliced and packaged in a way that allows simple portioning and less than two minutes and thirty seconds of cook time means less time in the kitchen and more time enjoying your family. Each serving also packs a punch of protein–23 grams to be exact. Creating a healthy and delicious meal has never been so simple!
Gary’s QuickSteak Sirloin is now available at your local Price Chopper.
100% all natural, thinly sliced sirloin steak with no preservatives or artificial ingredients that cooks from frozen. 23 grams of protein per serving, 3 servings per package.
Sirloin Cheesesteak Sandwich
The sirloin cheesesteak sandwich is truly what started it all. Read more about how Gary’s QuickSteak creates its iconic cheesesteak and shop for products that can help you make this sandwich at home in minutes!
INGREDIENTS
- 1 pkg 12 oz. package Gary’s QuickSteak Sirloin *
- 1 pkg Wow! Seasoning
- 1/2 C Green Peppers (julienne sliced)
- 1 C Onion – White or Yellow (julienne sliced)
- 8-12 slices Cheese (any type, white or yellow)
- 2-4 Hoagie Buns
INSTRUCTIONS
- In a large skillet prepare Gary’s QuickSteak Sirloin portions according to package directions.
- After steak is flipped and broken apart, add the seasoning package, onions and peppers to steak and sauté until onions just begin to wilt and become translucent.
- Place 4 cheese slices on a hoagie bun and top with steak.
NOTES
*Please follow package label guidelines for proper temperature for all cooked meats and poultry.

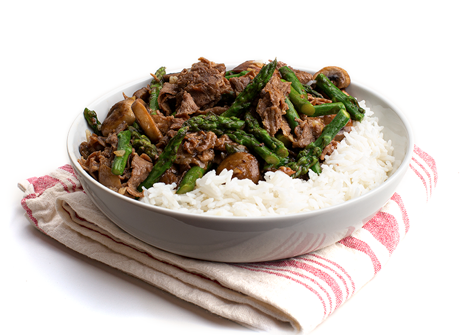
Sirloin, Mushrooms, And Asparagus
Delicious way to put together sirloin, mushrooms, and asparagus quickly for dinner!
INGREDIENTS
- 1 Tbsp Cooking Sherry
- 3 Tbsp Soy Sauce (Divided)
- 1/4 tsp Ground Ginger
- 1 12 oz package Gary’s QuickSteak Sirloin
- 1 Tbsp Cornstarch
- 1 Tbsp Hoisin Sauce
- 1/4 tsp Sugar
- 1/2 C Beef Broth
- 4 oz Sliced Button or Portobello Mushrooms
- 2 lbs. Asparagus, fresh, cut into 1-1/2” Lengths
- 1 Clove Garlic, minced
- 3 Tbsp Avocado or Canola Oil (Divided)
- Cooked Rice or Cauliflower Rice
INSTRUCTIONS
- In a small bowl mix sherry, 1-1/2 tbsp. soy sauce and ground ginger and stir together.
- In another small bowl mix together the cornstarch, hoisin sauce, 1-1/2 tbsp. soy sauce, sugar, and beef broth, set aside.
- In a large skillet add 1 tbsp. oil to pan and heat until shimmering, add frozen QuickSteak Sirloin portions and sear on one side, flip meat, pour the sherry and soy sauce mixture over the cooking sirloin portions and continue to break apart.
- When meat is no longer pink and starting to brown, remove from the pan and set aside.
- Add the remaining oil to the same pan, add the mushrooms, garlic and sauté until the mushrooms have just begun to let go of their juices. Add asparagus and sauté until tender crisp. Add the cornstarch mixture to the pan and bring to a boil, stir for two minutes, and add the Sirloin to the pan and heat through.
Serve with cooked rice/cauliflower rice
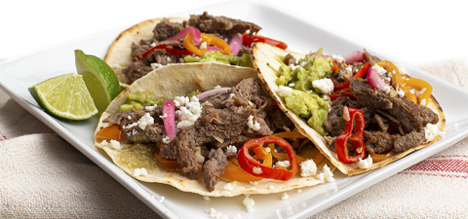
Carne Asada Tacos with Pickled Onions
These tacos aren’t your standard street tacos, and they take minutes to make with Gary’s QuickSteak Sirloin.
INGREDIENTS
- 4 Garlic Cloves (chopped fine)
- 1/4 tsp Cumin
- 1/4 tsp Hot Chipotle Powder
- 5 Red and Yellow Mini Peppers (sliced into rings)
- 1/2 Jalapeno Pepper (seeded and diced fine)
- 1 12 oz. Gary’s QuickSteak Sirloin
- 1 Lime (juiced)
- 18 Corn Tortillas (warmed)
- 1/4 C Green Salsa Verde
- 4 oz Cotija Cheese
- 1 C Cilantro Leaves (torn or rough chopped)
- Prepared Guacamole
- Additional Limes
Pickled Onions
- 1 Red Onion (sliced thin)
- 1/4 C Kosher Salt
- 1 Tbsp Sugar
- 1/2 C Apple Cider Vinegar
INSTRUCTIONS
- To prepare pickled onion, place sliced onion in a bowl with salt and sugar, let sit for 10 to 20 minutes, place in a strainer and rinse under cold water. Place the onions in a bowl with vinegar, cover and refrigerate.
- In a large skillet begin to prepare Gary’s QuickSteak Sirloin according to the package directions, after flipping the sirloin portions add the first 5 ingredients and sauté for an additional two to three minutes.
- Pour lime juice over sirloin and let rest a few minutes.
- Assemble the tacos in the warmed shells filling with the seasoned sirloin and peppers add salsa, guacamole, cheese, onions cilantro and pickled onions.
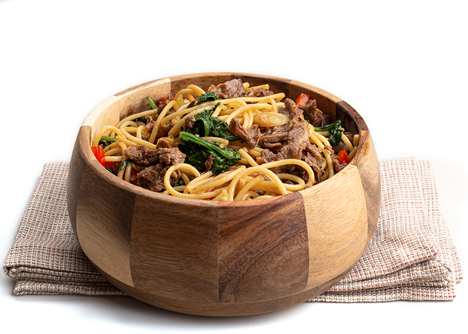
Sirloin and Spinach Lo Mein
Try this Sirloin and Spinach Lo Mein with Gary’s QuickSteak Sirloin.
INGREDIENTS
- 1/2 C Hoisin Sauce
- 2 Tbsp Soy Sauce
- 1 Tbsp Water
- 2 tsp Sesame Oil
- 2 Garlic Cloves (minced)
- 1/4 tsp Crushed Red Pepper Flakes
- 1 12 oz. Package Gary’s QuickSteak Sirloin
- 1 pkg Spaghetti Noodles
- 2 Tbsp Oil (Canola or Avocado)
- 1 can Water Chestnuts (sliced and drained)
- 2 Green Onions (julienne slices)
- 10 oz Spinach (fresh, chopped)
- 1 Red Pepper (seeded and julienne slices)
INSTRUCTIONS
- Mix first 6 ingredients in a small bowl, divide mix in half.
- Cook spaghetti according to package directions, drain, cover, and set aside.
- Add 1 tbsp. oil to a large skillet, add QuickSteak Sirloin, sear on one side, when meat begins to break apart, pour ½ of prepared sauce mix over cooking steak.
- Turn patties, stir-fry until no longer pink, remove from pan, set aside.
- Add 1 tbsp. oil to the same skillet, add water chestnuts, green onions and red peppers, stir-fry one minute.
- Add spinach and remaining sauce mix, stir until spinach is wilted, return steak to pan, combine with spinach, add the cooked spaghetti, heat through and sprinkle with chili pepper.

Round up your change at checkout and help support the Salvation Army.
Price Chopper/Market 32 will match all donations, up to $5,000.
This holiday season, The Salvation Army expects to see a greater need for our services – more than any in recent history.
Unemployment rates are expected to be 10%-11%, and based on the increased service we’ve already provided this year due to COVID-19, we need resources to serve up to 155% more people with Christmas assistance.
COVID-19 has not only created a bigger need for us to fill, it has also decreased the number of traditional red kettles you’re used to seeing on street corners and at store entrances each Christmas season. In fact, we could see up to a 50% decrease in red kettle funds this year due to several factors, including:
- Consumers carrying less cash and fewer coins
- More online shopping, which means less foot traffic in shopping areas
- Unemployment rates
- Recent closures of some brick-and-mortar retail stores
For more information visit, www.salvationarmyusa.org
Thanksgiving is one of the many great food holidays of the year. A plethora of yummy dishes are prepared, served, and enjoyed. The only problem? Too many leftovers! But don’t fear, these two recipes below will turn those leftovers into lovely meals!
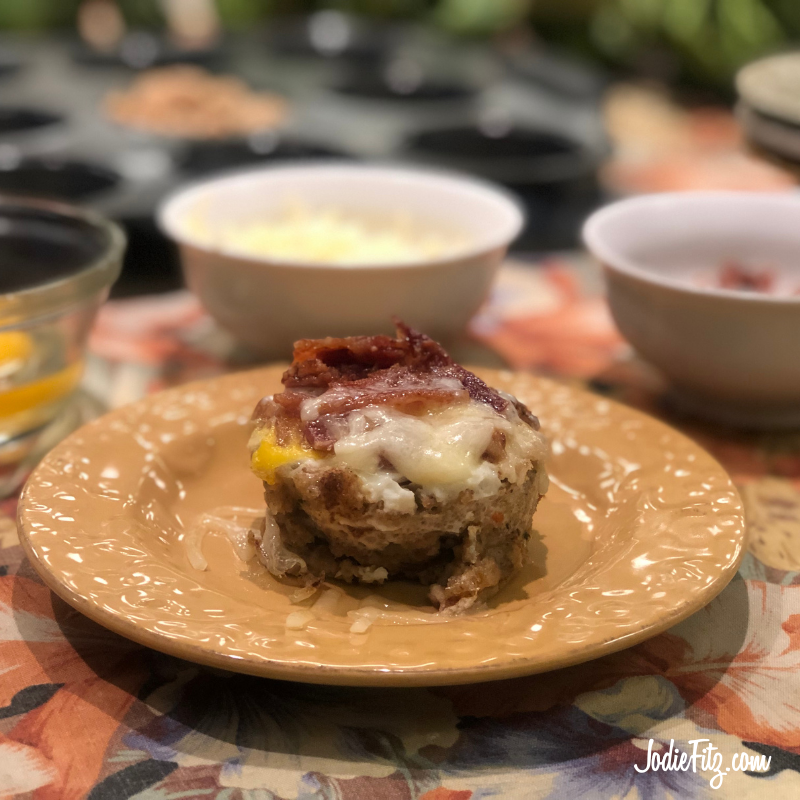
Stuffing Egg Cups by Jodie Fitz
Leftover Stuffing
PICS eggs, large
PICS bacon, cooked and diced
PICS shredded sharp cheese
PICS nonstick cooking Spray
Preheat the oven to 375 degrees.
Coat each muffin tin cup with the nonstick cooking spray.
Add 2 – 3 tablespoons of leftover stuffing to each cup and press it to form a thin bowl of stuffing that covers the side and base of each individual cup in the muffin pan.
Add an egg to each cup.
Top each cup with diced, cooked bacon and shredded cheese. Bake the egg bites for approximately 15 minutes, until the egg is fully cooked and the cheese is melted.
Baked Bacon: Cover a baking sheet with aluminum foil. Lay the strips of bacon on the foil. Bake for approximately 18 – 20 minutes. Remove the bacon strips from the foil with tongues, and place them on a plate lined with a paper towel to absorb any extra grease.
Other Meats: You can swap the bacon for breakfast sausage, diced ham or even diced leftover turkey.
Add in leftover veggies: You can dice your favorite leftover veggies and add them to the top of the egg along with the bacon or you can eliminate the meat and go vegetarian.
Top it off: You can also add a little cranberry sauce on top for a sweet and savory mix of leftovers.
Thanksgiving Leftover Garbage Bread by Jodie Fitz
1 PICS pizza dough, thawed
Brie cheese, room temperature
Leftover stuffing
Leftover cranberry sauce
Leftover turkey, diced
PICS butter, room temperature
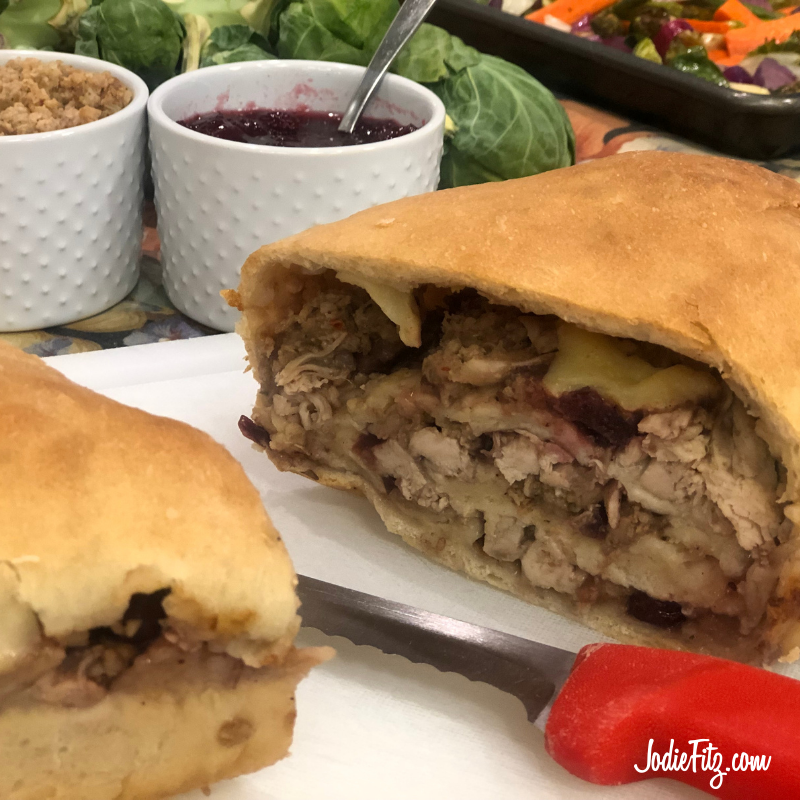
Preheat the oven to 350 degrees.
Butter the sides and base of a glass loaf pan.
On a floured surface, roll the pizza dough into a rectangular shape.
Cut the rind off of the Brie cheese.
Spread the Brie cheese onto the rolled dough.
Generously sprinkle the leftover stuffing, cranberry sauce and turkey on top of the cheese.
Roll the dough up with all of the leftovers. Pinch the seam together, fold the edges and press those together.
Place the stuffed dough, seam down into the loaf pan.
Bake the garbage bread for 40 – 45 minutes.
Remove the loaf from the pan, slice and serve warm.
Leftover Veggies: You can slice and dice leftover veggies and add them to the mix as well.
Store it! You can wrap the bread in waxed paper or parchment paper, place it in an airtight storage bag and keep it in the refrigerator for a couple of days. Slice and warm before serving. This is best warmed in an oven or toaster oven.