


NY Apple Recipe Roundup - 10 Ways to Love a Bag of Apples
Ellie Wilson
MS RDN
Apples From New York™ are in season, and in the store! One of our favorite Home.grown crops, New York Apples are a quick snack, or a culinary chameleon – so versatile and easy to enjoy! Making your way through a bag or tote of New York apples is a smart way to add flavor, fiber, crunch and nutrition benefits to every meal and snack. Check out this fun recipe roundup that will make you look forward to that apple-a-day in some new ways!
New York apple agriculture is very important – New York is second in the USA for apple production. The farm families that grow apples are multi-generational stewards that carefully nurture the land and trees, to ensure you get delicious, nutritious fruit for your family meals. September is #FamilyMealsMonth, no better time to explore new ways to eat well as a family, and add some new meal and snack ideas if you are navigating new school routines and need some inspiration.
Home schooling? Use the website resources and crunch on apples as you learn about farming, local foods, cooking, history, agriculture, science, and nutrition – children of all ages will love these lessons!
Store smart – keep apples crunchy and fresh by storing in the refrigerator or a cool, dry space. Wash apples before using for recipes or snacks by rubbing skins briskly under cool running water.
Apple-palooza!
- Simple snack – grab that apple for a mid-morning crunch or afternoon munch.
- Slice and serve – apple slices are a super snack, and easy with an apple slicer. Pack them fresh with a squeeze of lemon to keep them from browning, dip into PICS Peanut Butter or dust with cinnamon for a fresh twist.
- Breakfast boost – grated fresh apples are a quick and easy addition to overnight oats recipes, PICS yogurt parfait (vanilla/apple/walnuts/yum!) – love them on my PICS Shredded Wheat cereal with milk!
- Salad savvy – Chopped apples are a great addition to salads, including many of the fresh salad kits in the store. Try any one of your favorite apple varieties with Fresh Express Poppyseed, Sweet Kale or Honey Pecan salads. Some PICS Cheddar Cubes or pulled Market 32 Rotisserie Chicken make the meal in just a minute!
- Sandwich smart – PICS Flour tortillas/pita or your favorite Market 32 Bakery bread are a great base for a ham or turkey/apple/cheddar quesadilla or panini. Pulled pork with grated apple or a side of apple coleslaw with pecans are fresh takes on old favorites. Or, try your new favorite Chicken Apple Kale Slaw Wrap.
- Snack attack – No-bake apple “donuts” will win the day and sneak some nutrition into afternoon snacks. Peel and core two apples, then slice into rings. Spread peanut or almond butter (you can call it icing, we won’t tell!) on one side of the ring, and top with crushed cinnamon cereal, nuts, pretzels or even sprinkles.
- Sweet and savory – New York apples will help you make quick dinner magic with some fresh takes on sheet pan and skillet meals. Each meal below serves 4.
- Apple Panko Skillet Chicken – (4) Market 32 Apple Panko Chicken Cutlets, made fresh in the Meat Department, sautéed in PICS Olive Oil until done (160F) – pair them up with a quick New York apple and onion sauté and a warm fresh Bakery cornbread muffin.
- Apple Sheet Pan Dinner – Chop (2) New York apples, (2 small) yellow onions, and (2 medium white or yellow) potatoes in a one- inch dice. Add 1 bag (fresh or frozen) Brussels sprouts and place on an oiled sheet pan with (about 1 Lb.) Market 32 Chicken Tenders or Skinless Thighs, OR Market 32 Sweet Chicken or Italian Sausage, OR cubed pork tenderloin. Roast at 400F for about 30 minutes, or until meat is done (160 F) and vegetables are tender and caramelized. If using sausage, be sure to turn them once during cooking.
Apple Cider Chicken and Cabbage – Place aluminum foil in a sheet or roasting pan, oil lightly with PICS Olive Oil or vegetable oil spray. Lay about 1 Lb. of Market 32 Skinless Chicken Breasts in the center. Surround with (3-4) peeled, chopped New York apples. Roast for 25 minutes at 350F, then baste with ½ cup of New York Apple Cider mixed with 1 tsp PICS Dijon Mustard. Roast for an additional 10 minutes, until chicken is 145F and apples are tender. Serve with warm Market 32 Bakery rolls and sautéed fresh cabbage.
Fun in the Kitchen
The Price Chopper Kids Cooking Club has some amazing apple recipes, like this one for Apple Pie Ice Cream Apple Pie Ice Cream. Cooking and baking can be part of home -schooling lessons – measuring ingredients promotes math skills, and reviewing recipes supports reading and science skills.
Learn more about the many varieties of home.grown. Market 32 New York apples you can find in our stores. Tips, hacks and amazing recipes can all be found here. Enjoy!
Peanut Butter and Jelly Smoothie Bowl
by Jodie Fitz
1 – 1 ½ cups PICS frozen fresh strawberries
1 cup PICS Greek vanilla yogurt
¼ cup PICS honey
1 teaspoon PICS vanilla extract
Place the frozen strawberries, Greek yogurt, honey and vanilla extract into a blender or food processor. Blend until the ingredients form into a soft serve ice cream consistency.
Scrape the mixture into a bowl and top it with the following;
- 2 tablespoons PICS peanut butter
- Granola cereal
- Organic coconut flakes
- Chia seeds
- Flax seed, ground
- Fresh strawberries
Enjoy!
More thoughts on the Peanut Butter and Jelly Smoothie Bowl:
Dairy Allergies? Replace the Greek vanilla yogurt with your favorite dairy free yogurt alternative. There are several great options depending on your needs in the dairy aisle at your Price Chopper/Market 32 Supermarkets.
Peanut Allergies? Substitute the peanut butter for WOWButter®. It’s a peanut/tree nut free alternative located in the allergy friendly aisle at Price Chopper/Market 32 stores.
Lessons for Children when making this smoothie recipe;
- Measuring ingredients
- Blending
- Blender/Food Processor Safety
- Following directions
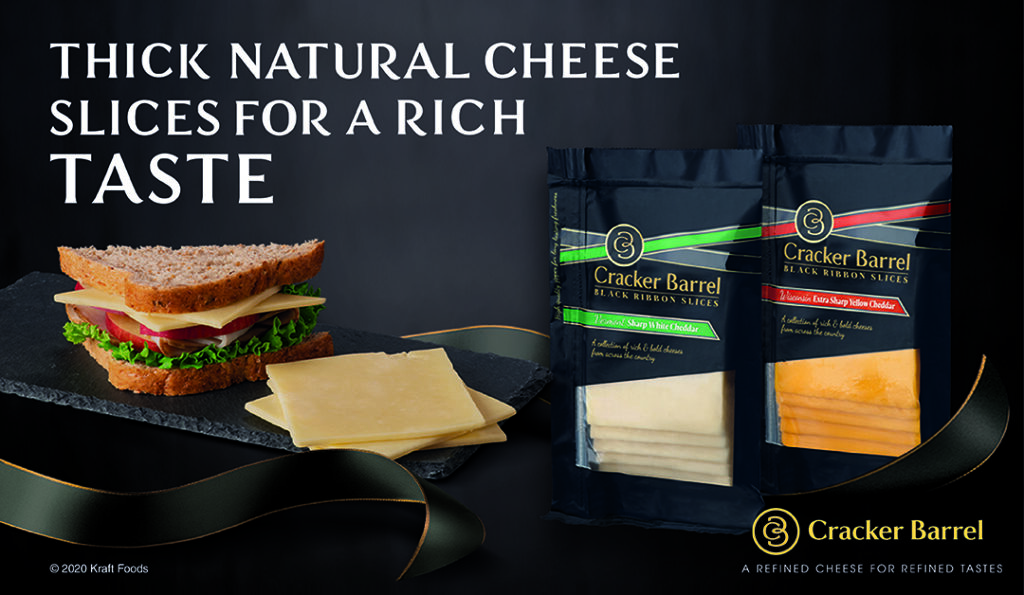
Checking Out - Cracker Barrel Sliced Cheeses
Ellie Wilson
MS, RDN Senior Nutrionist
Cheese please! Cracker Barrel cheeses have been pleasing Americans for generations. The brand was launched in 1954 by Kraft, a heritage brand itself in cheese, as a premium product named for the tradition of socializing around the cracker barrel, an icon of small general stores. Friends and neighbors would gather around the cracker barrel, and spend time connecting, sharing and creating stronger communities.
The sliced cheeses of the Cracker Barrel line, found in the dairy aisle, bring favorite flavors to the table, with Extra Sharp Wisconsin Yellow Cheddar, Heartland Swiss, Wisconsin Mozzarella, Vermont Sharp White Cheddar tapping into dairy traditions from around the U.S. Consistently rich in flavor, the award-winning cheeses are made with proprietary heritage starter cultures that have been part of the Cracker Barrel tradition for over 50 years. The signature black packaging is easy to open and zips closed to maintain freshness. These packages are also very portable, great for day trips and picnics, when you want to grab and go.
Cheese and dairy are getting fresh research on benefits – the matrix of nutrients in dairy includes being a good source of calcium and protein, and using sliced cheeses helps those working on managing calories and serving sizes. Sliced cheeses are a convenient and quick way to top dishes with flavor as they finish cooking, add a creamy layer of flavor in a casserole or sandwich, or power up a quick snack of cheese and (of course) crackers!
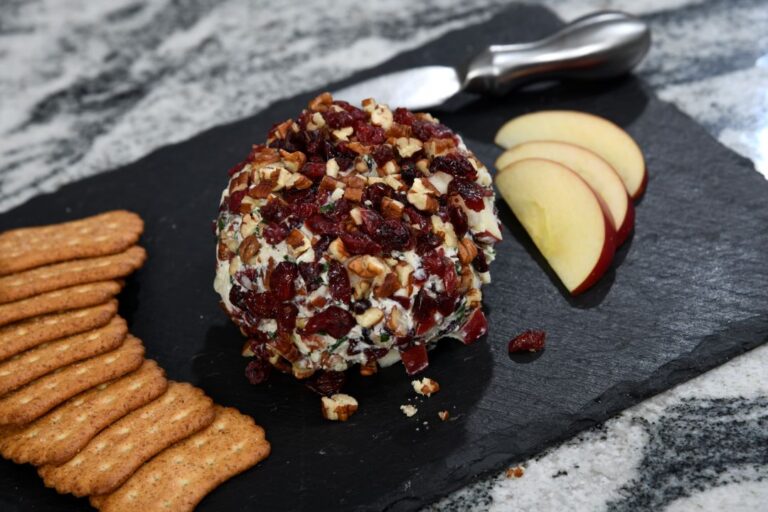
With shoppers looking for ways to eat something interesting, and reduce food waste, exploring ways to update leftovers with cheese is a win-win. Leftover grilled chicken? Add some pasta sauce and a slice of Wisconsin Mozzarella for a quick new meal. Leftover veggies? Top with a slice of Extra Sharp Wisconsin Cheddar for a quick flavor boost. Powering up produce? Pair sliced apples and Vermont White Cheddar for a sweet and savory snack! Enjoy!

Checking Out - Creative Roots Coconut Beverages
Ellie Wilson
MS, RDN Senior Nutrionist
It can be challenging to ensure children are drinking enough – they get busy, are easily distracted, and can also be chronically fussy about what they will drink. Busy parents have a lot going on right now, especially concerning in a time when everyone is working harder to choose well and provide choices that support good health habits. Drinking water and staying hydrated is essential, and for families on the go, there is a new option on the shelves to explore and enjoy.
The Creative Roots Coconut Water plant-based beverage line starts with coconut water, and is then flavor enhanced with 15 % juice and natural sweetener stevia. Simple ingredient lists and exciting flavors, like Watermelon Lemonade and Peach Mango may be enough to tickle their taste buds and get them to finish up the right-sized 8.5 oz bottle every time they take one. Younger children may also like the fruity characters, The Sploots, decorating the label and sharing smart hydration messages. They feel good when they are hydrated, and you feel good knowing they are improving hydration without added sugars – one gram of sugar in each bottle.
How does this fit into your busy family routine? The Creative Roots Coconut Waters are perfect for grab and go when you are late for the game, headed out on the summer road trip, or playing in the backyard sandbox. It may be a great addition to a child or teen backpack as a handy hydrator in the middle of the day. More than 50% of children may be under-hydrated per a study published in the American Journal of Public Health ¹ – and with new policies in schools likely limiting access to water fountains, the Creative Roots line may be a good back up plan. Families can be confident in their risk management and supporting positive immune system biochemistry with hydration. Kids and adults love the flavor, and some seniors are packing these for their busy days as well. Explore all four flavors to find your favorites. Enjoy!
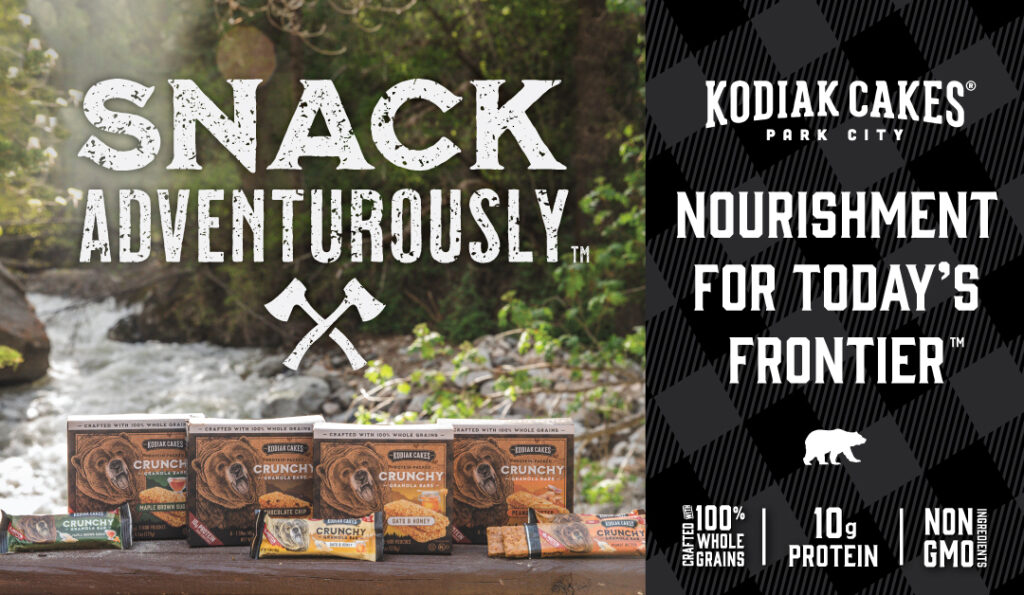
Kodiak Cakes Crunchy Granola Bars
High up in the mountains of Park City, Utah, the folks over at Kodiak Cakes have spent their spring perfecting a new snack for adventurers, explorers, and hungry people across the country. We are proud to introduce our brand-new Kodiak Cakes Crunchy Granola Bars. That’s right, be
still my beating heart, because the whole-grain, non-GMO oats that people know and love from our Kodiak Cakes Power Oats have taken on a whole new form.
Our bars are light, crispy, and packed with the protein that folks who are on-the-go need to get through whatever task lay ahead. So, whether you’re scaling a mountain, taking a break on the sidelines, packing a lunch, or digging through the pantry, we think we may have created your new favorite snack. With flavors like Chocolate Chip, Peanut Butter, Oat & Honey, and Maple Brown Sugar, there’s a frontier inspired granola bar for everybody.
The pioneers of yesteryear may not have had the luxury of getting the nutrients they needed for rugged expeditions from a single perfectly-packaged snack — but we do. These bars may feature hearty, rustic ingredients, but they’re made to fit today’s frontier. They’re convenient, delicious, balanced, and… did we mention crunchy?
So, what else sets our bars apart? Well, like everything that comes out of the Kodiak Kitchen —the ingredients are what matter most. So, when we created this recipe, we made sure to only use whole grain, non-GMO rolled oats, and no artificial preservatives. Besides making our bars more filling and protein-packed, it also means they’re lighter with an unmatched crunch.
But, don’t even start to worry about pockets, cupholders, or countertops because our bars have significantly fewer crumbs than the competition. That’s right, less mess and more yum — making them a great choice for little cubs or messy grown Grizzlies.
Looking to pick up a box of your own? Trek your way over to the snack aisle and look for the box with the big bear on the front!
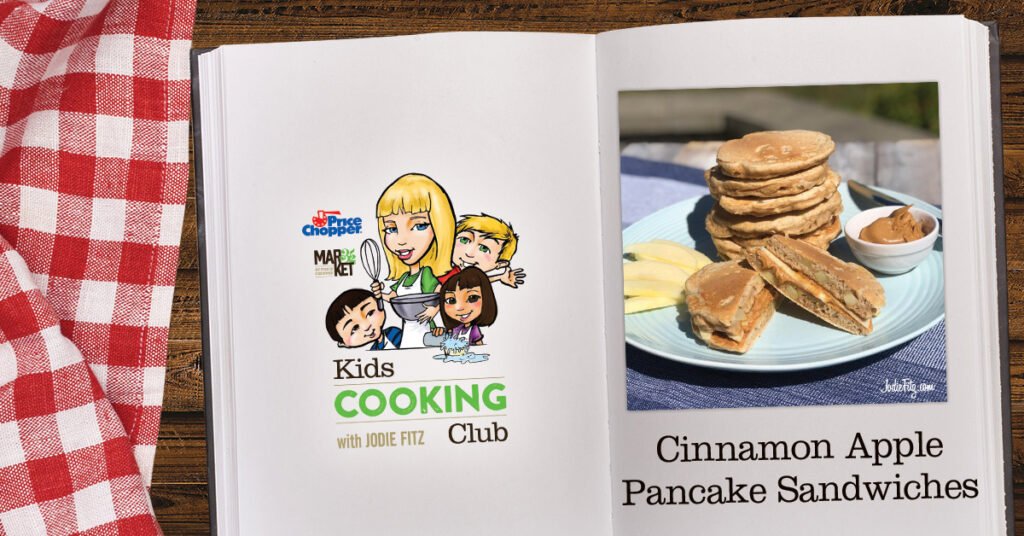
Cinnamon Apple Pancake Sandwiches
by Jodie Fitz
Great breakfast filler that you can have made ahead of busy days.
2 apples
1 ¾ cups PICS flour, unbleached
½ teaspoon PICS sea salt
1 tablespoon PICS baking powder
1 teaspoon PICS cinnamon
1 cup PICS milk
4 oz. PICS cinnamon applesauce
3 tablespoons PICS brown sugar
1 PICS egg, large
1 teaspoon PICS vanilla extract
Nonstick cooking spray
Peanut butter
Wash, peel, core and dice one apple into small pieces. Set it aside
Add the flour, sea salt, baking powder and cinnamon into a bowl. Stir the dry ingredients together so that the ingredients are evenly distributed.
Add the milk, cinnamon applesauce, brown sugar, egg and vanilla extract to the dry ingredients. Hand whisk the ingredients together.
Fold in the diced apples.
Cook the pancake batter in a griddle style pan coated with nonstick spray over medium heat until both sides are golden brown and the inside is fully cooked.
Wash, core and slice the additional apple. Create a breakfast pancake sandwich with peanut butter and apple slices.
Time Saver: Make the pancakes on a weekend. Let them cool completely. Wrap each one individually in parchment paper or waxed paper. Place each individually wrapped pancake in a freezer bag or container. Take them out and toast them on busy weekday mornings.
Gluten Free: Swap the flour for gluten free 1 to 1 flour options.
Peanut Allergy Alternatives: Swap the peanut butter for WOWButter® found in the allergy friendly aisle at your Price Chopper/Market 32 Supermarket.
Dairy Free: Try making this recipe with either rice milk or almond milk.
Lessons for Children when making this recipe;
- Measuring ingredients
- Leveling dry ingredients
- Whisking
- Dicing
- Spreading
- Slicing
- Knife safety
- Griddle Safety
- Pancake Flipping
- Following directions

Favorite Recipes from our Farmers
We love sourcing fresh, home.grown. produce and products from our local farming partners. These products provide our families with delicious recipes to enjoy throughout the year. It’s always our goal to make your family feel the same way. We hit up some of our local partners to highlight some of the best dishes that use the fresh, local products that they produce themselves. Check it out!
Spicy Maple Mayo: At Butternut Mountain Farm in Morrisville, VT, maple is a staple. They have a website full of maple recipes beyond your typical pancakes and waffles. Spicy Maple Mayo, for example, would make an excellent condiment for Labor Day Weekend.
Maple for Dessert: Sticking to syrup, Mapleland Farms in Salem, NY suggests using maple to satisfy your sweet tooth. They have so many delicious sweets on their website it was impossible to spotlight just one recipe. Check them out!
Summer Squash and Onion Quiche: A. Gurda Produce in Pine Island, NY benefits from their prime location in the “Black Dirt” region. Using some of North America’s most fertile soil to grow their onions, you can rest assured any recipe from these guys will be top notch.
home.grown. Corn Fritters: Our friends at Reeves Farms in Baldwinsville, NY hooked us up with this delicious recipe for Corn Fritters. It’s an easy, creative way for corn fanatics to get their fix.
Cold Hollow Apple Bread: Cold Hollow Cider Mill in Waterbury Center, VT features a number of comforting, tasty apple and cider recipes. Their signature Apple Bread is a must try if you’re a fan of fall flavor!
We’re grateful to work with so many great local producers who bring you and your family the finest home.grown. products all year round. Use Northeast-hailing ingredients in the best way possible by trying some of these all-star recipes. For everything you need, visit your local Price Chopper/Market or shop with us online.
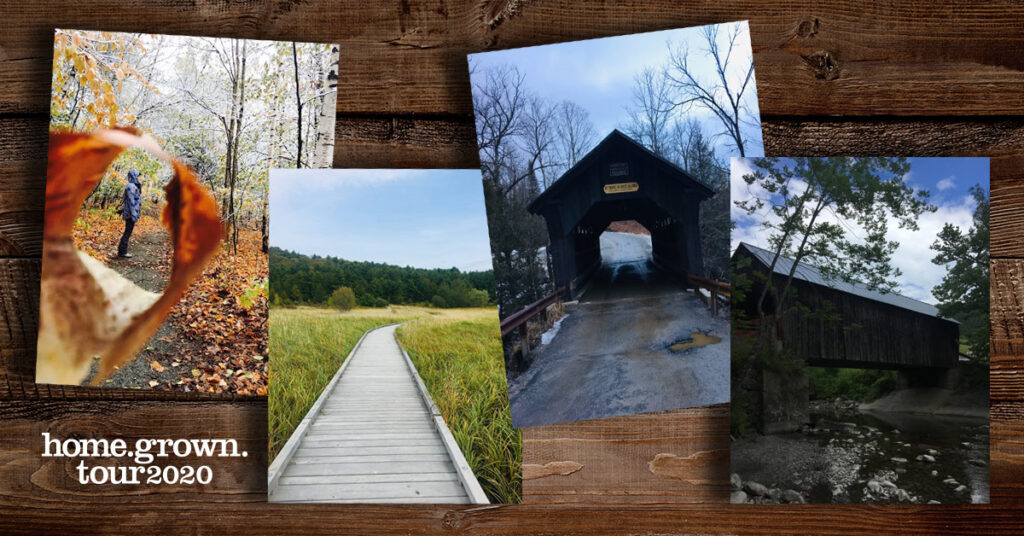
home.grown. Tour 2020: Teammate Abby on Tour!
We’re rockin’ the support for local farmers & producers on our home.grown. tour! Our tour has brought us to local dairy farms, maple sugaring farms, chocolate artisans and more. We recently discovered one of our own teammates who’s on a home.grown. tour of her own: Abby S. in our Bennington VT store! Check out Abby’s story below.
Abby, Co-Manager, Bennington VT Price Chopper
A few years ago, I came across a Vermont Club called the 251 Club. It encourages people to visit all 251 towns in the State of Vermont. I have slowly, over the last few years, been visiting the towns whenever I find the time throughout the different seasons Vermont has to offer. So far, I have 122 towns complete and have photographed every town sign I’ve visited.

My goal was to not just drive through the towns, but to stop and get out and walk around. I have seen amazing landscapes, historical sites, little country stores, farms, and even the tiny, struggling, forgotten towns of Vermont. I have traveled many dirt roads and seen places I would have never seen without the club. I have skied the many peaks Vermont has and snowshoed many locations including The Notch in Stowe. I have walked around in the hometown of President Calvin Coolidge, the 30th President of the United States, and even explored old Marble quarries that don’t operate anymore.

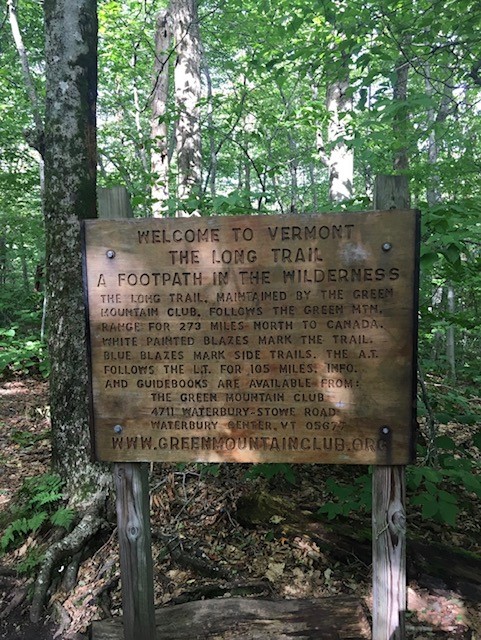
In the Fall of 2019, I began day section hiking The Long Trail. The oldest long-distance hiking trail in the country. It’s 273 miles span the entire length of Vermont. So far, I am approximately 40 miles in and have never been so mentally and physically pushed in my life but full filled at the same time. I have seen some of the most beautiful but rugged landscape a road can never bring me to. Vermont is an amazing place I am lucky to call home. It has more to offer than meets the eye, you just need to get out and look for it!
How cool is Abby’s tour? We love it! If you’re interested in learning more about our home.grown. tour, check out https://cms-uat-pch.unataops.com/homegrown-tour/.
Happy trails, from Abby and her Price Chopper & Market 32 team!
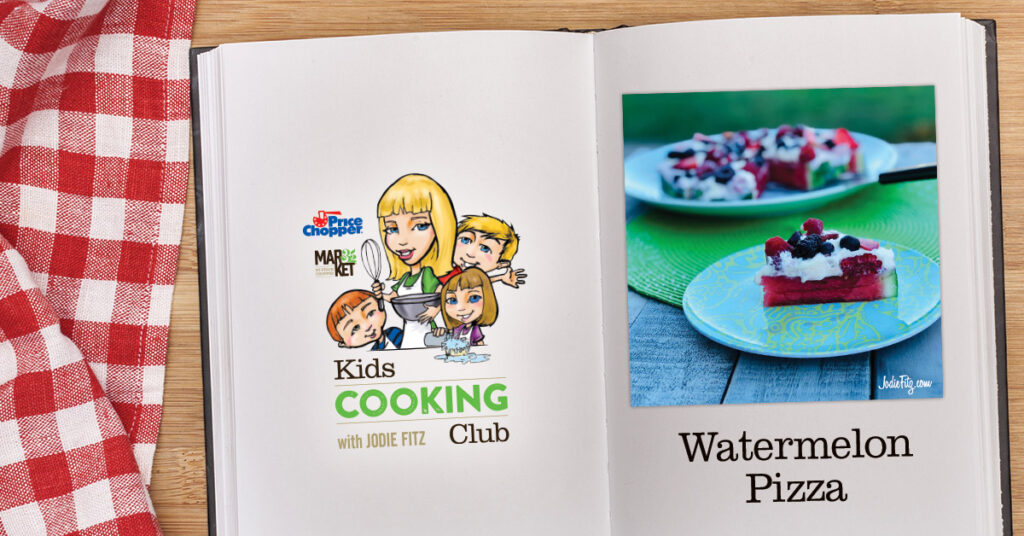
Looking for a lighter dessert option that’s delicious and fun to make? Try making an easy Watermelon Pizza; it’s fruity and fresh.
Watermelon Pizza by Jodie Fitz
8 oz. PICS whipping cream
¼ cup PICS confectioner’s sugar
1 teaspoon PICS vanilla extract
Watermelon
6 oz. PICS Greek vanilla yogurt
½ cup fresh strawberries
Fresh fruits (see below)

Prepare the whipped topping by adding the 8 oz. of heavy cream, the ¼ cup of confectioner’s sugar and 1 teaspoon of vanilla into a bowl. Whip it with an electric mixer until it reaches a stiff peak.
Layer 1:
Cut one large round slice out of the center of a whole watermelon. This will serve as your dough for your watermelon pizza. Place it on a flat surface.
Layer 2:
Rinse, hull and slice the ½ cup of strawberries. Place the sliced strawberries into a mini chopper, food processor or blender. Fold the strawberries and a third of the whipped cream into the Greek yogurt. Spread the mixture onto the watermelon circle.
Layer 3:
Spread the remaining whipped cream on top.
Pizza Toppings: Rinse and prep your favorite fruit to go on top. Here are some options, add your favorites,
- Sliced strawberries
- Blueberries
- Pitted, sliced fresh cherries
- Cut grapes
- Slices of kiwi
- Diced pineapple,
- Diced melon
- Banana slices
- Diced mango
Finally, cut your watermelon pizza into 8 slices and serve!
Dairy Free: Substitute the heavy cream with coconut cream. However, coconut cream will only reach a soft peak when whipping vs. a stiff peak.
Use your favorite dairy free yogurt alternative for the yogurt.
Lessons for children include…
- Whipping cream
- Stiff peaks when making whipping cream
- Slicing
- Dicing
- Spreading
- Folding
- Measuring ingredients
- Following directions
- Knife safety
- Electric mixer safety
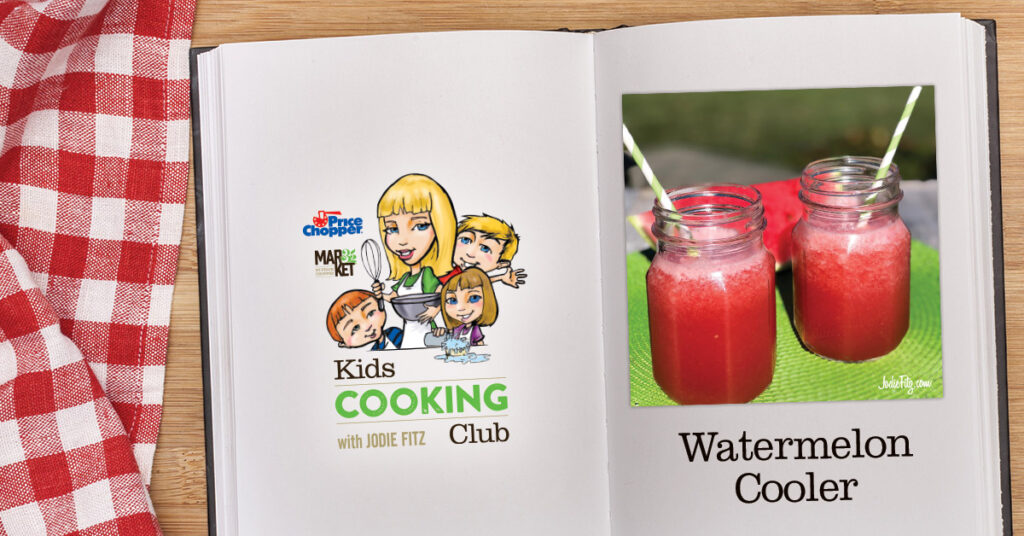
Keep the kitchen cool by making this watermelon cooler. It’s a light, refreshing drink with a whole lot of goodness in the mix. There’s just one thing….beware of brain freeze!
Watermelon Cooler by Jodie Fitz
3 cups diced watermelon
4 cups ice
2 lemons, fresh
½ cup PICS honey
1 teaspoon PICS vanilla extract
2 cups water
Remove the fruit of the watermelon from the rind and dice it into small chunks. Measure 3 cups of watermelon. Add it to the blender.
Measure and add 4 cups of ice to the blender.
Cut the lemons in half and extract the juice from the lemons using your hands, a citrus squeezer or juicer. If you are extracting the juice by hand, squeeze the lemon juice into a bowl and remove the seeds before adding the lemon juice to the blender.
Add the honey, vanilla extract and water to the blender.
Blend the ingredients well and serve!
Little Hands: Younger children can cut the watermelon using a plastic knife.
Lessons for children when making the Watermelon Cooler Recipe:
- Dicing
- Knife safety
- Measuring ingredients
- Extracting juice
- Blending and blender safety
- Following directions